

Introduction
Ensuring your website's security is non-negotiable. One fundamental step is encrypting data transmitted over the web, and SSL (Secure Sockets Layer) is the key. In this guide, we'll navigate through the SSL setup process using Let’s Encrypt and Nginx as a reverse proxy, guaranteeing a safe online experience for your users.
Prerequisites
A server where your website is hosted.
An A record pointing to your server’s public IP address.
Basic knowledge of the terminal.
Step 1: Update and Install Certbot
As usual, we begin by updating your package repository and upgrading packages on your server:
sudo apt update
sudo apt upgrade
sudo apt install certbot python3-certbot-nginx
Step 2: Configure Nginx
Ensure Nginx's configuration file has a server_name directive that matches your domain. Edit the Nginx configuration file:
sudo vi /etc/nginx/sites-available/yourdomain.com
Verify that you have the server_name directive:
...
server_name yourdomain.com;
...
Step 3: Obtain SSL Certificate
Utilize Certbot’s Nginx plugin to obtain your SSL certificate:
sudo certbot --nginx -d yourdomain.com
Note: Replace yourdomain.com with the actual server_name used in your Nginx configuration file.
Certbot will guide you through the configuration. Once done, your certificates will be stored, and Nginx will need to be reloaded.
sudo systemctl restart nginx
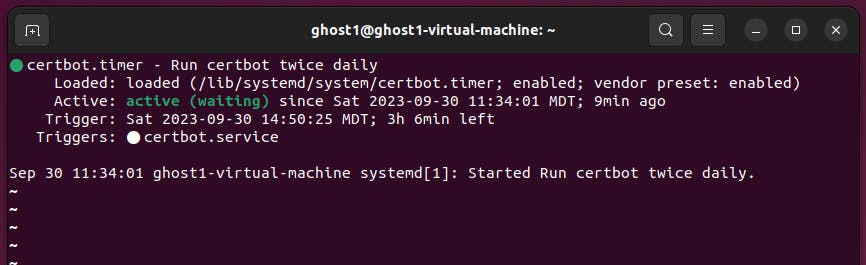
Step 4: Verify Certbot Auto-Renewal
Certbot automatically renews your SSL certificates. Check the renewal timer’s status:
sudo systemctl status certbot.timer
Test the renewal process with a dry run:
sudo certbot renew --dry-run
No errors indicate a successful setup. Certbot will handle your certificates, ensuring they're always up-to-date.
Conclusion
Congratulations! Your website is now secure with SSL, providing a safe browsing experience for your visitors. Stay tuned for more tech tips and security insights!